Where Creamy Meets Crunchy in the Sweetest Way
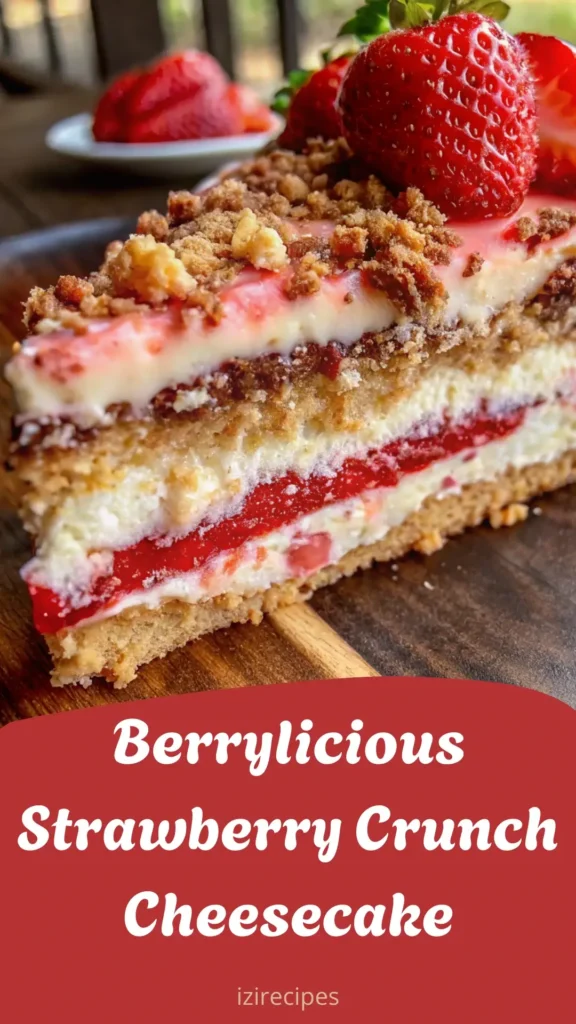
If you’ve been searching for the ultimate cheesecake recipe one that’s not just beautiful but irresistibly delicious your journey ends right here. Let me introduce you to the Berrylicious Strawberry Crunch Cheesecake. This dreamy dessert combines the rich creaminess of classic baked cheesecake with layers of strawberry cake, white chocolate ganache, and a nostalgic strawberry crunch topping that takes you right back to childhood.
It’s the kind of dessert that sparks conversation. The kind that gets devoured in seconds at birthdays, baby showers, or any celebration where dessert deserves a standing ovation. It’s more than just cheesecake it’s an experience.
Why You’ll Fall in Love with This Berrylicious Dessert

- Creamy meets fluffy: The contrast of velvety cheesecake with soft strawberry cake is unbeatable.
- That crunch! A sweet, strawberry-flavored crumble gives every bite a playful texture.
- Gorgeous presentation: Whether you drizzle it with strawberry glaze or top it with fresh berries, this cake is an absolute showstopper.
- Strawberry lover’s dream: From the cake layer to the topping, it’s strawberries all the way.
Ingredients You’ll Need
For the Crust:
- 2 packs of honey graham crackers, crushed
- 2 tablespoons sugar
- ½ cup melted unsalted butter
For the Cheesecake Layer:
- 3 (8 oz) blocks of cream cheese, softened
- 1/3 cup sugar (to mix with cornstarch)
- 2 tablespoons cornstarch
- 1 cup sugar
- 2 teaspoons vanilla extract
- 3 large eggs
- 1 cup heavy cream
For the Cake Center:
- 1 premade or boxed strawberry cake (baked and leveled to fit)
For the Topping:
- White chocolate ganache (melted white chocolate + warm cream)
- Strawberry crunch crumble (vanilla cookies + strawberry Jello powder + butter)
- Strawberry glaze or sauce for drizzling
How to Make Berrylicious Strawberry Crunch Cheesecake
Step 1: Make the Crust
Preheat your oven to 350°F (175°C). Mix your crushed graham crackers, sugar, and melted butter until you get a wet sand consistency. Press this mixture firmly into the bottom of a greased 9-inch springform pan. Bake for 10-12 minutes until golden. Let cool.
Step 2: Create the Cheesecake Filling
Start by beating one block of cream cheese with the cornstarch and 1/3 cup sugar until smooth. Slowly incorporate the rest of the cream cheese, the remaining sugar, vanilla, eggs (one at a time), and heavy cream. Beat until creamy and lump-free, but don’t overmix.
Step 3: Insert the Strawberry Cake
Trim your baked strawberry cake layer so it fits snugly inside your pan. Pour a thin layer of cheesecake batter over the crust. Gently place the cake layer on top. Pour the remaining cheesecake batter over the cake, smoothing the top.
Step 4: Bake Low and Slow
Wrap your pan in aluminum foil and place it in a large baking dish filled with hot water (a water bath). Bake at 325°F for 1 hour and 20–30 minutes until the center slightly jiggles. Then, turn off the oven and let the cheesecake sit inside with the door cracked for another hour.
Step 5: Chill Completely
Let your cheesecake cool at room temperature, then refrigerate for at least 6 hours or overnight. Trust me, this is when the flavors deepen and the texture becomes perfect.
Step 6: Add the Finishing Touches
Pour white chocolate ganache over the top of the cheesecake and gently spread it out. Sprinkle the strawberry crunch crumble generously, pressing lightly to help it stick. Drizzle with strawberry glaze and chill again for 30 minutes before slicing.
Make the Strawberry Crunch Topping
You’ll need:
- 1 cup crushed golden Oreos or vanilla wafers
- 1 packet strawberry-flavored Jello powder
- 4 tablespoons melted butter
Mix all three ingredients in a bowl until crumbly. You can bake it on a tray at 300°F for 10 minutes if you want a firmer crunch, but it’s great as-is too!
Tips for a Perfect Cheesecake
- Use room temperature ingredients for the smoothest filling.
- Don’t skip the water bath it prevents cracking and ensures even baking.
- Bake low and slow for that dreamy, dense texture.
- Cool gradually to prevent sudden shrinkage or cracks.
- Chill overnight for the best flavor development.
Berrylicious Serving Ideas
Serve your strawberry crunch cheesecake with a dollop of whipped cream, a few fresh strawberries, or even a scoop of vanilla bean ice cream. It’s decadent, it’s bold, and it deserves a fancy plate maybe even a gold fork if you’re feeling glam.
This cheesecake is perfect for:
- Valentine’s Day
- Mother’s Day brunch
- Spring and summer parties
- Impressing your coworkers
- Gifting your taste buds the joy they deserve
Common Questions About Strawberry Crunch Cheesecake
Can I make it without the strawberry cake layer?
Of course! The cheesecake alone with the strawberry crunch is still divine.
What if I want to make it more “berrylicious”?
Try mixing fresh chopped strawberries into the cheesecake batter or swirl in a few tablespoons of strawberry jam before baking.
How do I store leftovers?
Wrap it tightly and refrigerate for up to 5 days. For longer storage, freeze slices individually and thaw in the fridge overnight.
Can I use other berries?
Absolutely! You can swap strawberries for raspberries, blueberries, or a mix for a berry medley twist.
Final Bite: Is It Worth It? Oh, You Bet.
There are cheesecakes, and then there’s the Berrylicious Strawberry Crunch Cheesecake rich, creamy, colorful, and filled with love in every bite. It’s sweet, but not too sweet. Crunchy, creamy, and crazy beautiful. Whether you’re an experienced baker or just diving in, this is one of those desserts that’ll have everyone asking for the recipe.
So grab your apron, preheat that oven, and get ready to wow your tastebuds and everyone else’s too.
🍓 Tried this recipe? Share it on Instagram with #izirecipes and tag us @izirecipes!
We love seeing your delicious creations!


